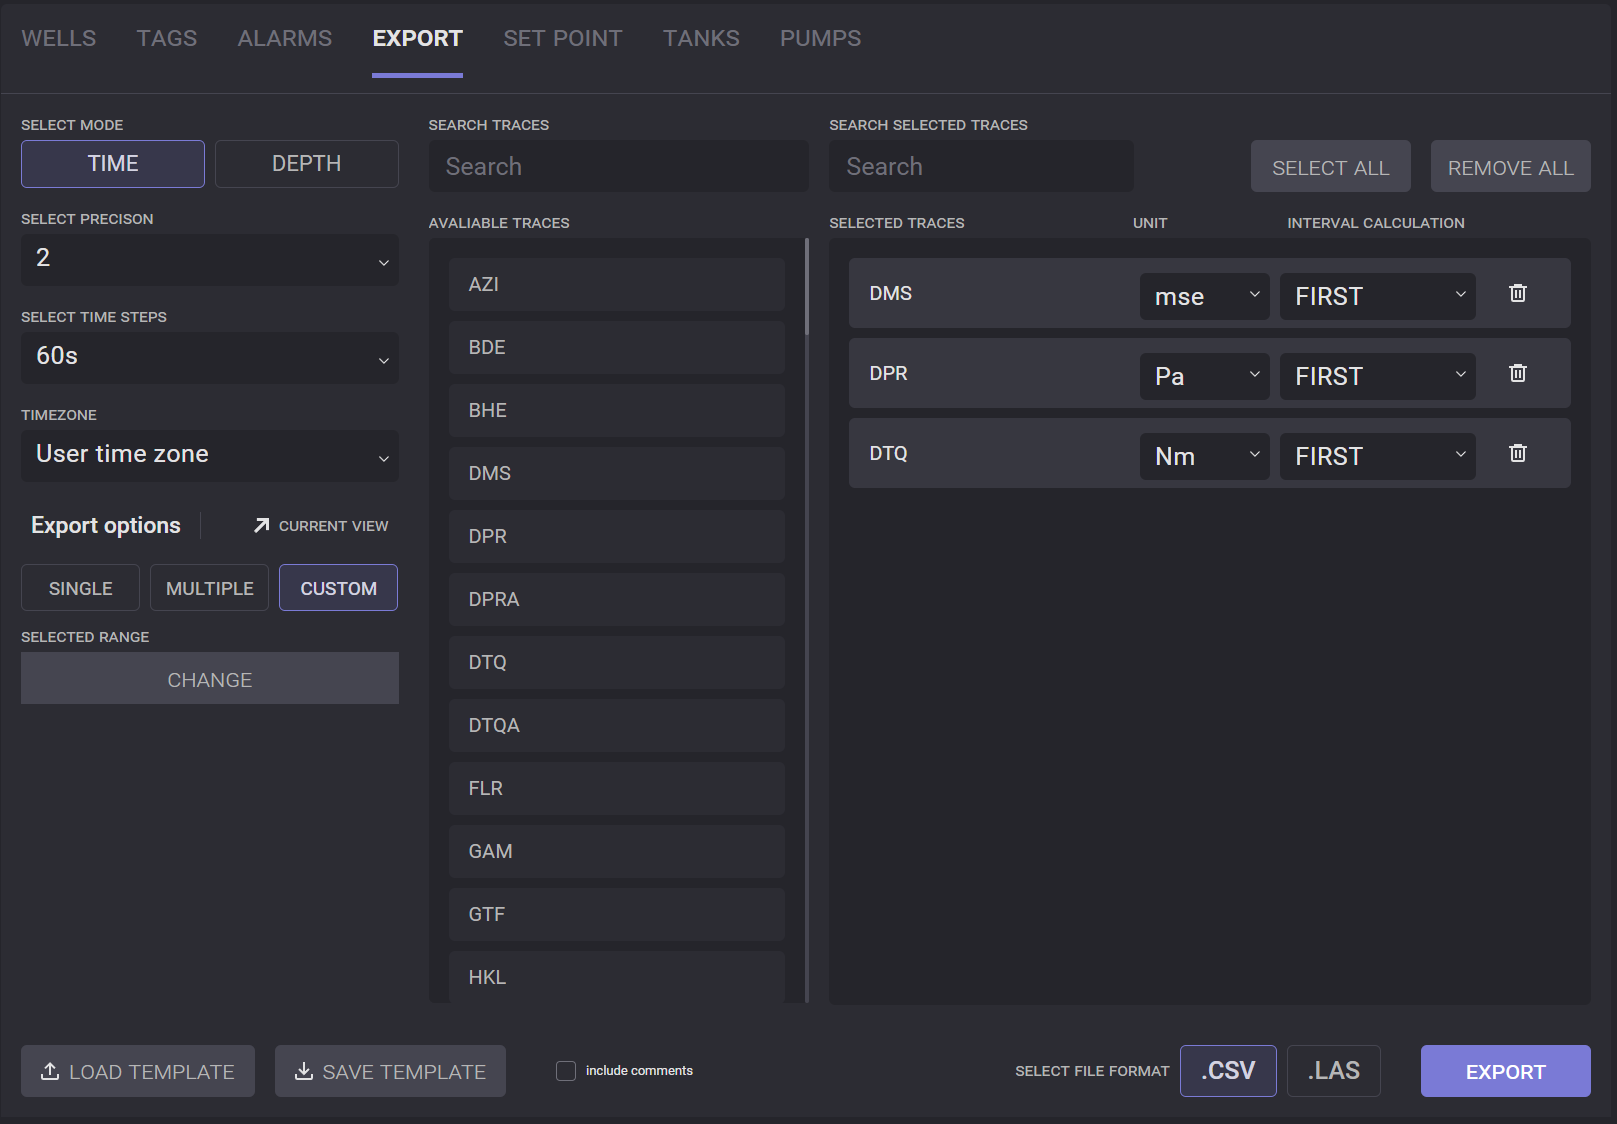
On the Export tab can be downloaded .csv or .las file with traces data.
Select Mode
To export a .csv file, select the corresponding option on the export page. Specify the parameters of exporting the file:
-
Precision;
-
Time step (in seconds)/Depth step (in meters);
-
Timezone;
-
Export option to display depending on selected mode.
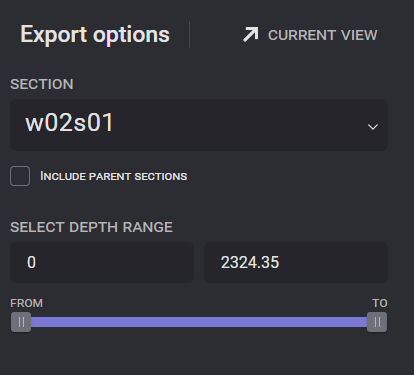
For the depth mode, the section for export data should be selected from the drop-down list. The range of the selected section for export can be defined on the range picker. Only selected depth will be included in the exported file.
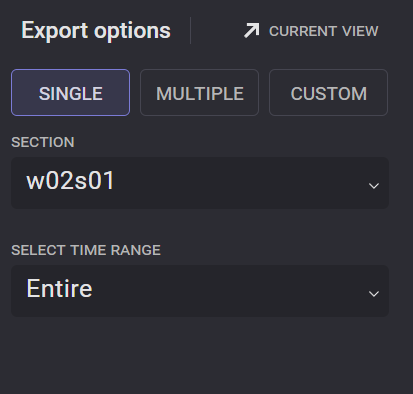
There are three export options available for the time mode export: Single, Multiple, Custom. For the Single export option, a time range for one section can be selected for the export. For the multiple option several sections for export can be defined. In this case the whole time range for the selected sections will be included in the export file.
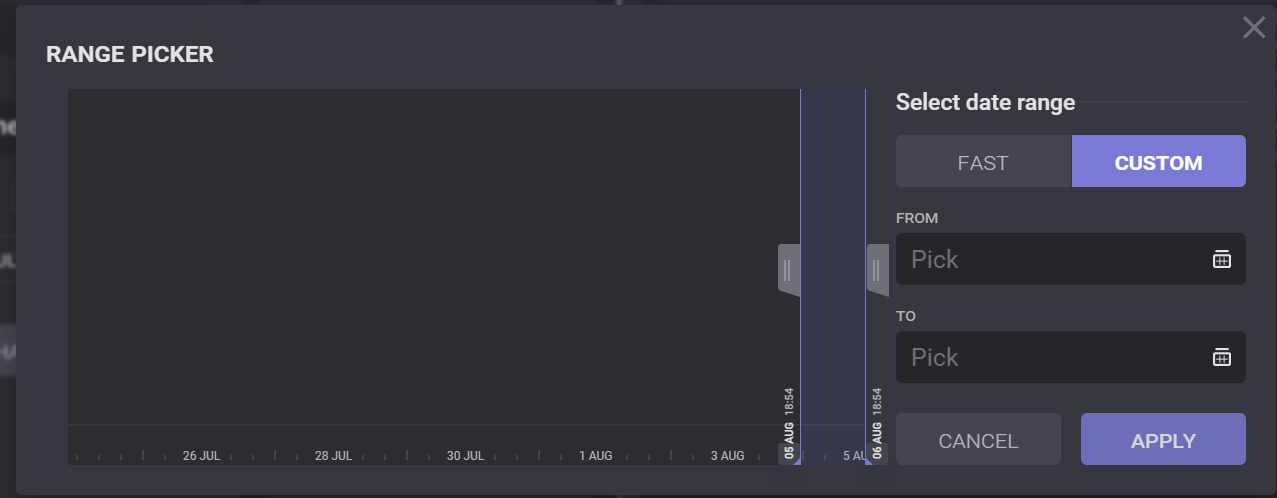
The custom option allows setting the date and time range for exported data. The range can be selected on the range picker chart by dragging the controls or entered manually in the right part of the dialog. Fast selectors allow to set predefined ranges. Clicking on the range will change the current range to the selected one and will set the end of the range to the latest date and time.
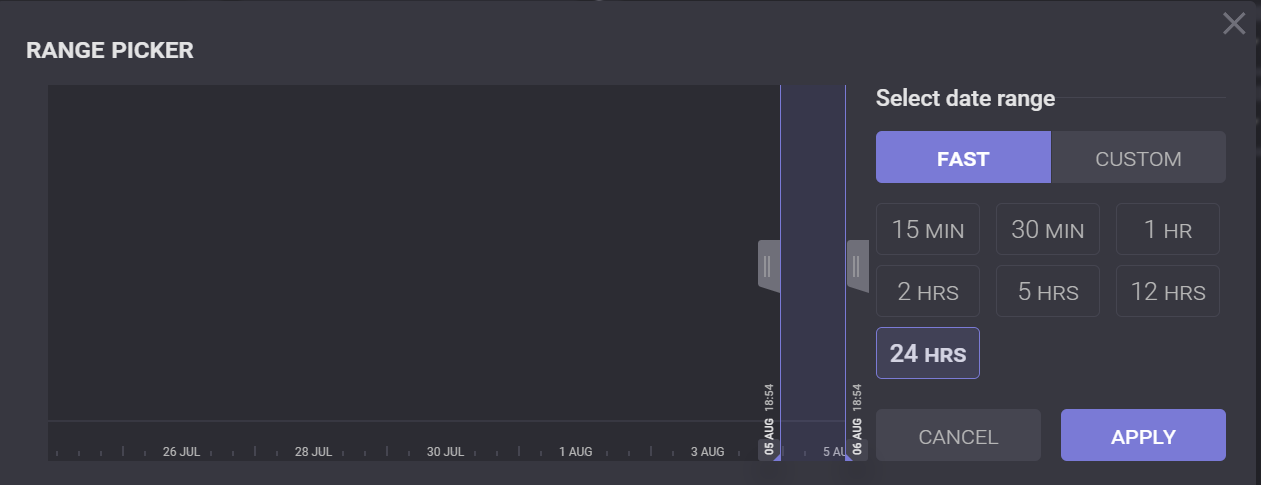
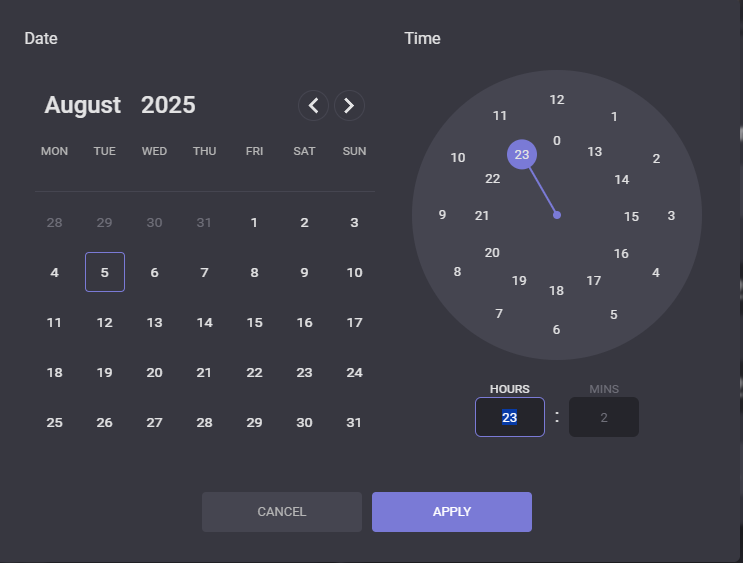
Custom options allow to define precise from and to date and time for export. Click on the field From/To expand date and time picker.
In the expanded dialog, a preset time range or dates and time can be selected. Click on Apply will add it to the field.
the Available
Click on the trace tag in the Available traces list adds it to the Selected Traces list. All selected traces will be included in the exported file. The units and calculation interval for added traces can be changed. Clicking on the field expands the drop-down list with available units or intervals. Selected units/intervals will be used in the exported file.
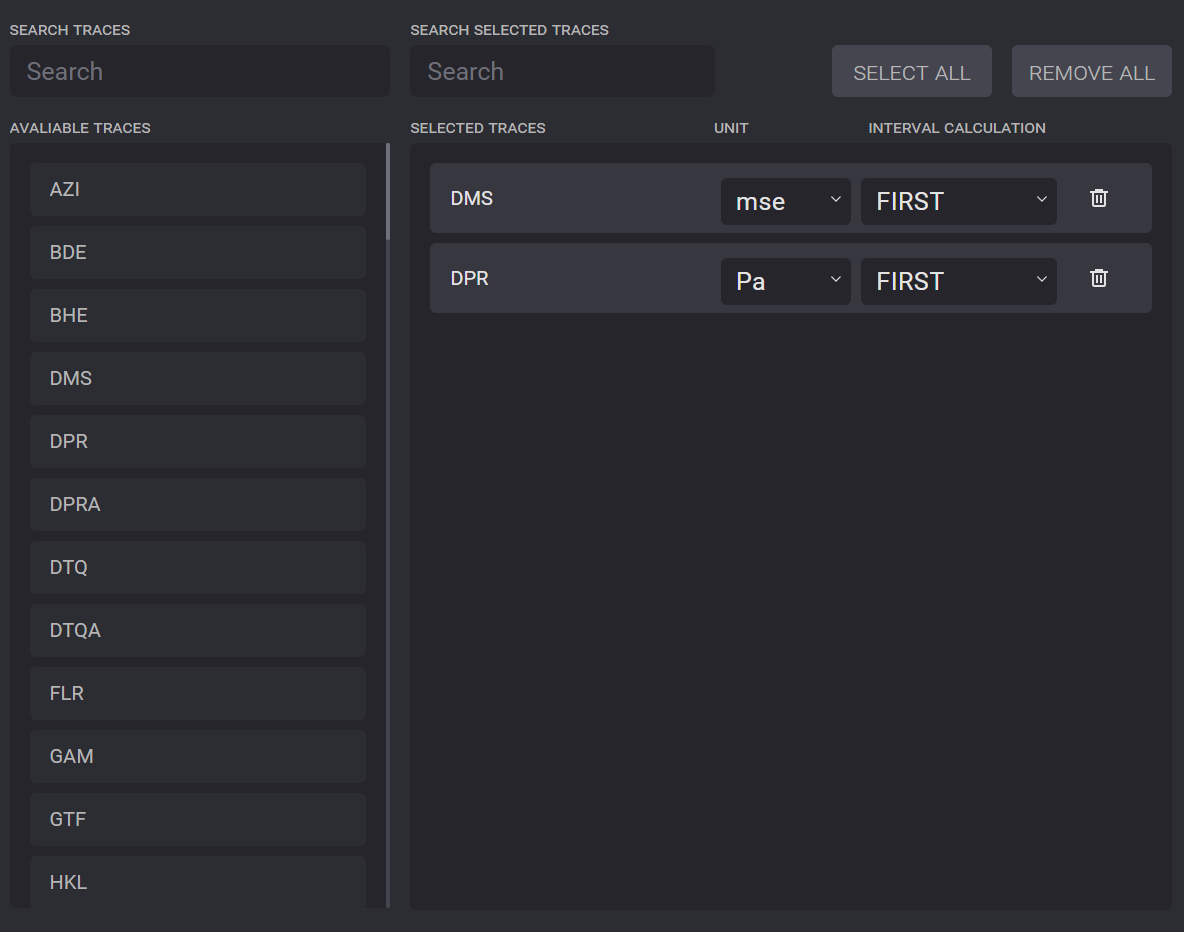
The Select All option will add all available traces to the list for export. Remove All to clear the list of selected traces.
Using Templates
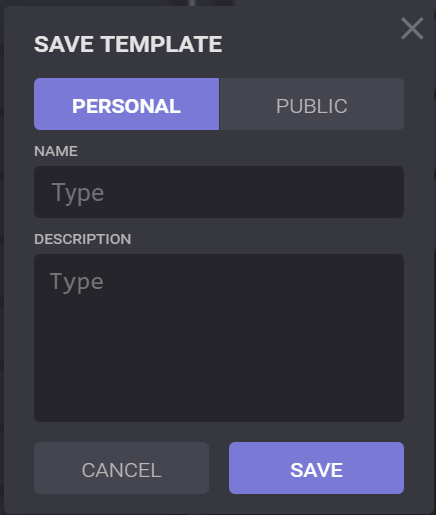
A template for export can be created and reused later. To create a template, set up your export setting and click on the Save Template button. In the opened dialog, select the type of the template (Persona or Public), enter Name and Description (optionally), and click on Save. The template with defined settings will be created.
To use a saved template, click on the Load Template button. In the opened dialog all available templates are listed and can be managed. To use the template, click on the Load option next to the necessary template.
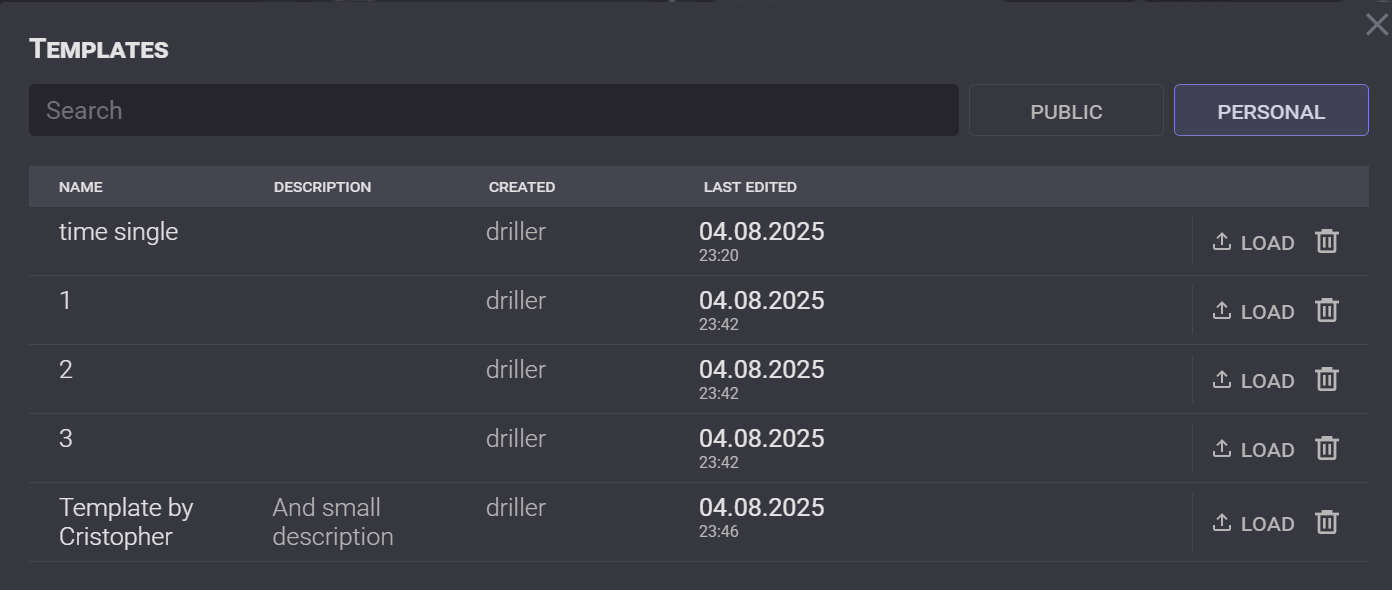
Settings of the selected template will be applied to the export settings.